The Proper Table Setting for Formal Tea

Tea can be enjoyed at any time of the day, on any occasion and circumstance. You can throw a tea bag into your cup and let it steep until ready. Then enjoy your afternoon tea while sitting on the couch or bed, at the veranda table, or on the windowsill.
But if you decide to throw a tea party with friends, perhaps you’d like it to be a bit more ceremonial, just for a change. If you and your friends love tea, you’ll be all for it!
Afternoon and high teas were especially popular during the 19th century. Although such tea gatherings are less common today, tea is growing again in popularity as people discover its health benefits.
While a simple tea party with a few friends doesn’t have to be super strict, it’s still nice to know all about certain rules, such as how to properly serve sugar, milk, and tea. For a bigger gathering (such as an English tea party), it’s a great chance to learn about arranging a formal tea party.
If you wish to arrange a formal tea party table setting and establish a tea etiquette but feel a bit intimidated, don’t worry. The task shouldn’t have to be daunting. Because it is a formal tea setting, every item on the table has a purpose in its place.
Learning things in a step-by-step manner will make everything much easier to follow, and soon you’ll feel more confident with setting up a formal tea party on your own. You’ll realize that anyone can arrange a beautiful tea setting. If you have a taste for sophisticated table arrangements, consider that a big bonus.
Step 1:
Cover your table with an attractive tablecloth. Aside from making your tea party table look pretty, a tablecloth will also protect your table from spills and crumbs.
Step 2:
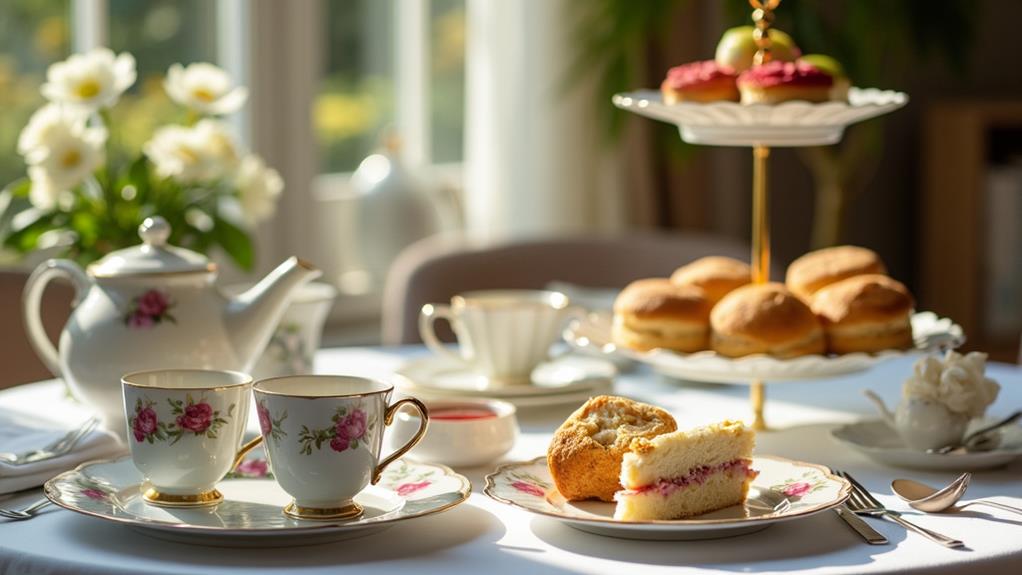
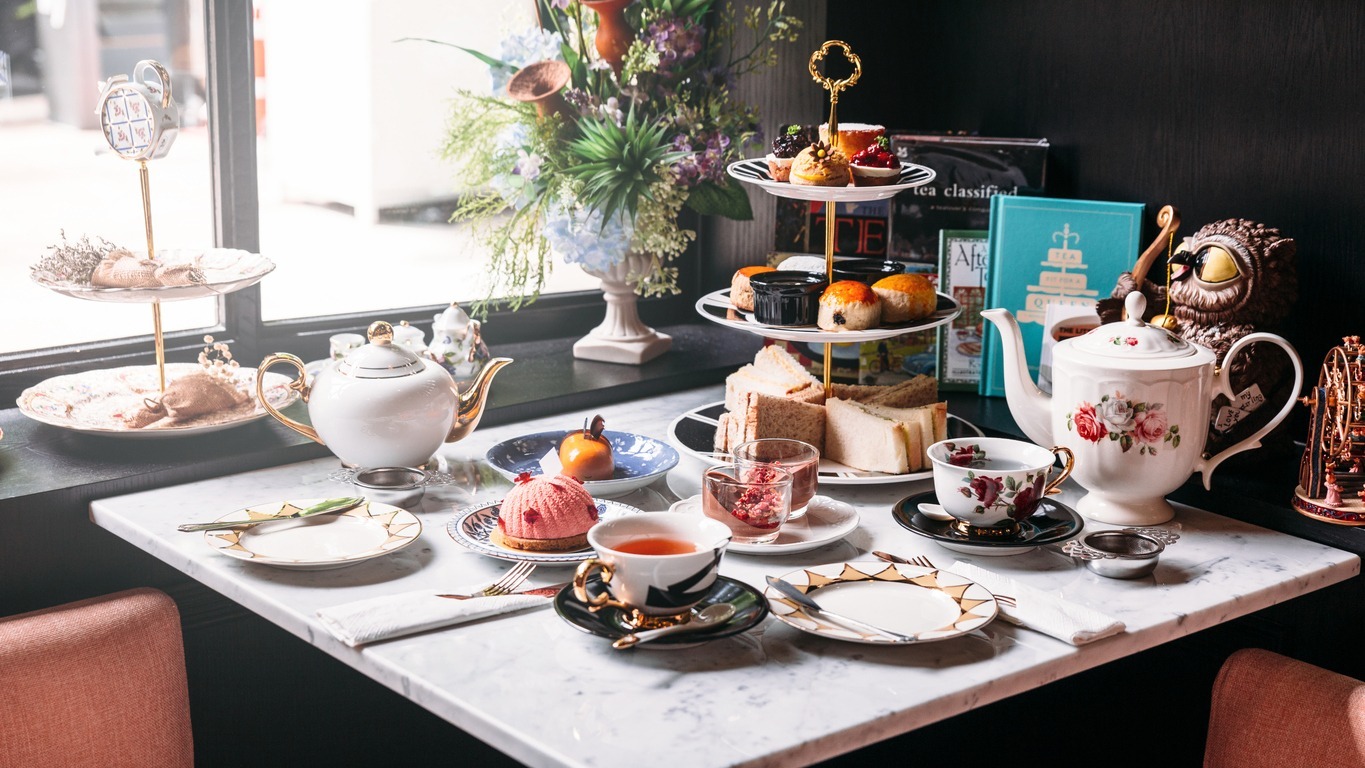
Place plates in the center of the setting. Unless you’re going to serve the standard full-course meal, the guests are usually provided with one plate only. Typically, a dessert or luncheon-size plate (9 to 9.5 inches in diameter) is used, but you may use other plates if necessary.
Step 3:
Place a small luncheon or salad fork on the left side of the plate. By the way, apologies in advance to those who are left-handed, but the dining fork was originally introduced in Europe and is used with the left hand.
Step 4:
Put a small butter or luncheon knife on the right side of the plate. As the European dining etiquette shows, the dining knife is used with the right hand. Afternoon tea foods and snacks do not need cutting. The knife is used to spread jam and Devon or clotted cream, as well as to cut pastry.
Step 5:
Place a teacup on top of the saucer to the right side of the plate. The teacup handle should be facing the right-hand side at the three or four o’clock position. The arrangement makes picking up the teacup a lot easier (and again, apologies to the left-handed people!) without interfering with the other utensils on the table.
Step 6:
Place a teaspoon on the right side of the knife or the rim of the saucer, with the bowl facing upwards at the ten or eleven o’clock position and the handle facing at the two or four o’clock position. Apart the from proper order in which these utensils are first used, it’s also for easier access to pick up without interfering the other items on the table.
Step 7:
Place a linen napkin to the left of the luncheon or salad fork. The fold should be on the outside with the open corner facing the right into the plate. It’s arranged this way to pick up the napkin a lot easier and place it in one’s lap in a sweeping movement. The opening on the right prevents the folded napkin, once fully opened and spread out, from interfering the other utensils.
Step 8:
If you’re using a place card, place it in the center at the top of the plate. Every place card should bear the name of the guest to be seated on the table without messing up the entire table setting.
Step 9:
Place a pastry or dessert fork in the top center above the plate and behind the place card. The fork’s handle should face towards the left, with the prongs facing the right. Or you can also place the pastry fork to the inside left of the luncheon plate. It’s arranged this way as the pastry fork is always used for the last course.
Step 10:
Place a tea strainer or filter just above the teacup and saucer. The strainer prevents the tea leaves from getting into the teacup.
Step 11:
Place the teapot to the right and near or above the teacup and saucer. The teapot’s spout should face towards the left. The teapot should be placed close to the teacup and saucer for easy access without messing up the other utensils on the table.
Step 12:
Place a water glass above the knife or above the teacup if no knives are present. All beverages should always be served from the right side of the table.
Step 13:
Place the salt and pepper in the center above the dessert plate and pastry/dessert fork. The pepper should be placed on the left and salt on the right. It’s arranged this way because using salt requires the use of the spoon, so the spoon is always placed on the right.
Step 14:
Place the jam and Devon or clotted cream on the left and close to the luncheon plate. The knife or serving spoon should be placed with the handle facing the right. Optional food items, such as nuts, should be placed on the left side of the table to the left side of the plate. As the custom goes, food enhancers should always be placed on the left side of the setting.
Step 15:
Place the sugar, milk, and sugar tongs (if there are sugar cubes) at the center, above the plate, or on the left side of the plate. It is so arranged to enable the host or hostess pouring the first cup of tea to add sugar or milk to the beverage, if the guest desires.
As an option, some floral arrangements are placed to enhance the setting. Place the flowers in a way that does not interfere with the service or block the line of sight of another guest.